
Image Extender
Use this image extender to expand a photo into 16:9, 4:3, 1:1, 3:4, 9:16 or 21:9. Your first image is free, no sign-up.
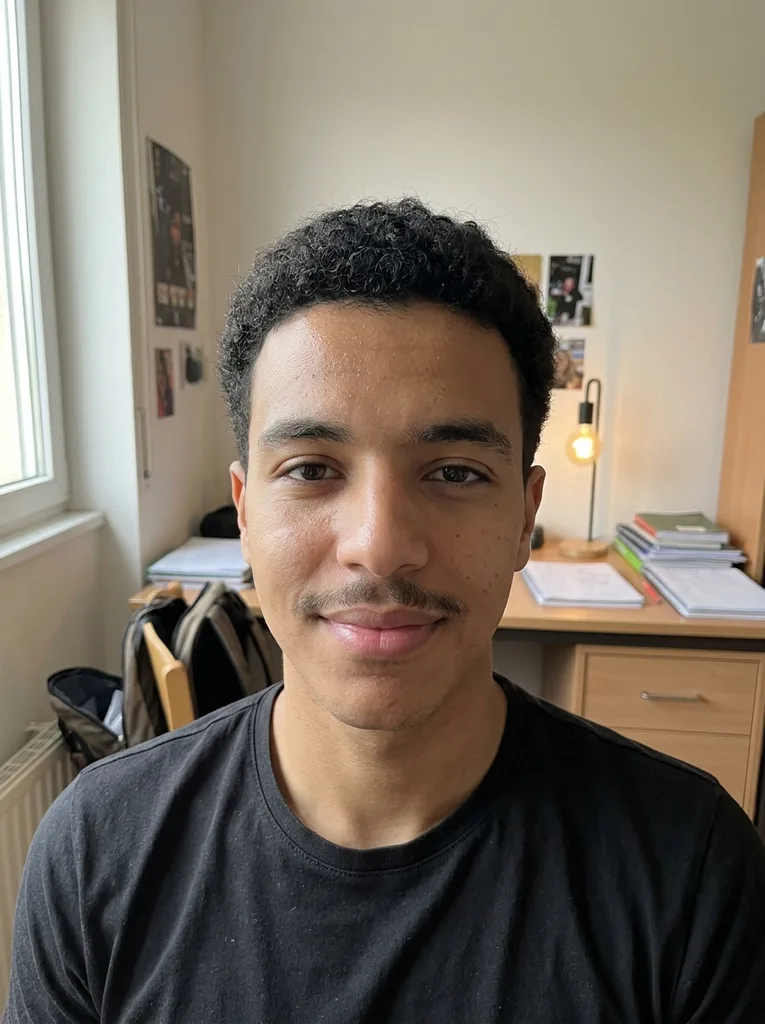 Before
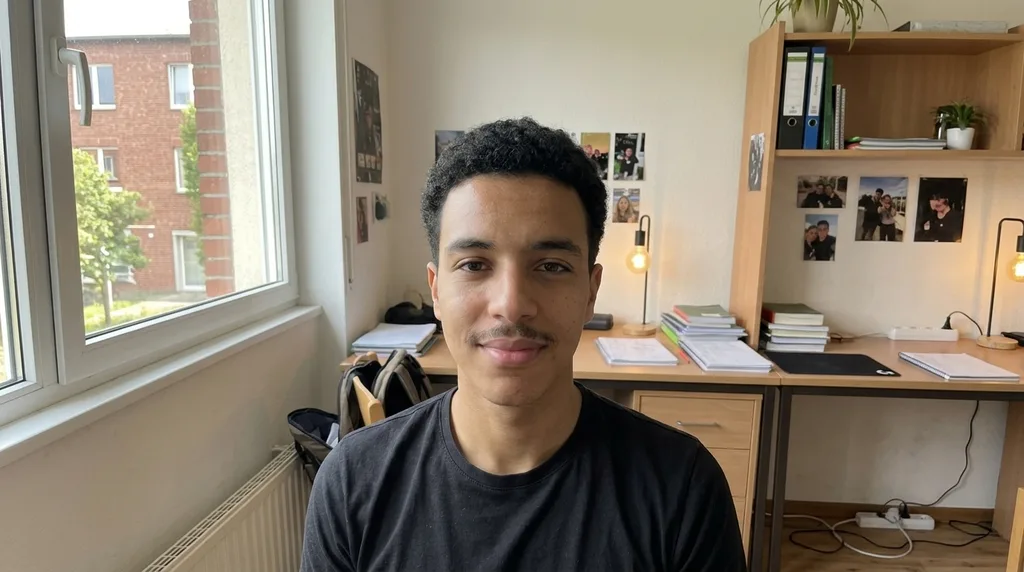 After
Example result. Upload your photo to make yours.
What this image extender does
Every photo has a frame, and sometimes the frame is wrong: a portrait shot that needs to be a banner, a square that needs headroom for a title, a snapshot cropped too close.
This image extender draws new scenery around your photo until it fills the shape you pick. You choose the new aspect ratio and the direction the picture grows, and the AI continues the sky, wall, floor or background from the edges.
The result is a generative edit of the whole frame, so check the edges against your original before you use it.
It suits the jobs where the photo is good but the canvas is not: a landscape that has to become a vertical story, a headshot that needs room on one side for text, or a family picture where the edge cut off the scene.
Made for
- Cropped photos
- Social posts
- Banners and covers
- Product shots
- Print frames
How to expand an image in three steps
- 1
Upload one photo
Click or drag a JPG, PNG or WebP file, up to 10 MB, into the tool. The photo is prepared in your browser before it is sent. One photo per run.
- 2
Pick the shape and the direction
Choose an aspect ratio for the new frame, then All Around, Left & Right, Upward or Downward. Add a note such as more blue sky if you want to steer the new area.
- 3
Extend and download
Press Extend Image. The result appears beside the original, and Download saves it. Your first image is free, with no sign-up.
Before you extend a photo
- Start with a simple background such as sky, wall, field or water, which an image extender continues most smoothly.
- Keep the subject fully inside the frame when you can, because cut-off edges are harder to continue.
- Pick a direction that matches the scene: Upward for sky or headroom, Downward for ground, Left & Right for width.
- Choose the ratio for where the picture will go, such as 9:16 for a story or 21:9 for a wide header.
- Use the note box to name what belongs in the new area, in plain words, up to 500 characters.
- Compare the result with your original and look at the seams before you download.
Why use this tool to expand an image
Shape and direction are separate choices
Six ratios, from 9:16 to 21:9, and four directions. The same ratio can add sky above a mountain or ground below a product.
You steer with words, not a brush
There is no mask or selection tool. The note box takes up to 500 characters, so you say what the new area should show, such as the rest of the room or more sky.
The size is stated
The result is a single image of about 1024 px on the long side. For a larger file, run it through the image upscaler afterward.
Nothing to set up
One image is free per visitor, with no sign-up and no credit card. Your photo is only used to create your images and is never used to train AI models.